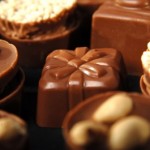
Keep chocolate in a cold place, below 75°F (24°C) if possible. At higher temperatures may turn chocolate grey (called blooming). This colour change indicates the cocoa butter in the chocolate has risen to the surface. It does not impair the flavour as the bloom disappears when the chocolate is melted.
Melting Chocolate
Melting must be done very gently as chocolate has a tendency to scorch or burn. Remember chocolate held in the hand melts easily so there is no need for high heat.
Hot Water Method
Unwrap chocolate squares and chop each square into 8 pieces. Place the chopped chocolate in a small bowl. Set the bowl over another bowl containing hot tap water and stir until the chocolate is melted. If you are melting several squares the water may need to be changed. It is not necessary to use a double boiler on the stove. Hot water from the tap is hot enough.
Microwave Method
Unwrap squares, chop and place in a microwaveable bowl. Melt on medium power for 2 to 3 minutes for 2 squares stirring once. Increase time for more chocolate. As microwave ovens vary in power watch carefully so you do not overheat.
Partial Melting
This technique is recommended for situations where the chocolate must first be melted and reset in a different form as in dipping fruit or truffles, bark, homemade candies or when making chocolate decorations such as drizzles or leaves. This technique developed by Baker’s Kitchens ensures the chocolate stays hard at room temperature and has a rich, dark, glossy finish.
- Chop each square into 8 pieces and place them in a bowl over hot tap water – not boiling. Do not use a microwave.
- Melt, stirring constantly until about one third of the chocolate remains unmelted. The small pieces of solid chocolate will help stabilize the melted portion so the chocolate will set firm and glossy and stay that way until served.
- Remove the bowl from the hot water and continue stirring until completely smooth. Be patient. It will eventually all melt.
- Always use partially melted chocolate while it is still lukewarm. If using it for dipping fruit, set the chocolate over a pan of lukewarm water to keep it from cooling down too quickly. Refrigerate (do not freeze) to set the chocolate quickly – if it cools down too slowly, the chocolate may have streaks.
- A cool room is recommended when working with partially melted chocolate. The ideal temperature is 60°F or 16°C. The cool room will set the chocolate quickly with no need for refrigeration. If the room temperature is higher refrigerate to set.
Warning
Do not let any water drip into the chocolate. When melting chocolate, even a single drop will cause the chocolate to tighten (seize), making it stiff and impossible to work with. If this happens, stir in 1 tsp (5 mL) vegetable oil or shortening for each square of chocolate. Do not use butter or margarine as they contain water and therefor make the problem worse. Some recipes call for chocolate to be melted with liquids. In this case it is a matter of proportion. A lot of liquid will not tighten the chocolate, but a little will.
GARNISHING WITH CHOCOLATE
Chocolate Curls
Warm the chocolate slightly util the texture is pliable enough to curl by:
- Microwaving on defrost for approximately 1 min per square
- Holding the wrapped chocolate in the palm of your hand until chocolate is slightly softened.
When slightly softened and pliable carefully draw a vegetable peeler over the smooth surfaces of the square selecting the bottom for long curls the side for short. Use a toothpick to lift the curls without breaking them.
Grated chocolate
Use a fine or coarse grater and grate chocolate on to a piece of waxed paper. For larger pieces use a coarse grater and warm the chocolate as you would for curls.
Drizzling chocolate
Partially melt chocolate with 1 tsp (5 mL) oil over hot water. (This makes it easier to cut when set.) Remove from heat and continue stirring until completely melted. Drizzle chocolate with a spoon or pour chocolate into a small plastic bag. Make a small hole in the corner by poking it with a toothpick and drizzle in evenly spaced lines over icing or in a random pattern to decorate plates. Refrigerate to set chocolate.
Glazing
For a plain chocolate glaze with no additions, partially melt chocolate over hot water. Remove from heat and continue stirring util completely melted. Spread over dessert immediately. Tap pan on counter to distribute glaze evenly of zigzag a knife through the chocolate to create a pattern.
Freeform Shapes
Partially melt chocolate over hot water, Remove from heat and continue stirring until completely melted.
Make your own decorating cone from waxed paper or use a small plastic bag with a tiny opening cut in the corner. Pour melted chocolate into tube or bag and pipe into desired shapes on waxed paper. Work free form or slide a homemade stencil under the wax paper to guide you. Fill in with chocolate or just use the out line. Chill. Carefully remove chocolate from waxed paper. Store in refrigerator.
Use this method to create numbers and initials, butterflies, line drawings, profiles, caricatures, cartoon characters.
Chocolate Cutouts
Partially melt chocolate over hot water. Remove from heat and continue stirring until completely melted. Pour onto waxed paper lined baking sheet. Cover lightly with another sheet of waxed paper and roll lightly with a rolling pin until l/8 inch .3 cm thick. Chill until set about 5 minutes. Peel off top layer of waxed paper and cut shapes with cookie cutters or paper patterns. (If the chocolate is too brittle to cut, stand at room temperature for a few minutes.) Save any remaining pieces of chocolate for melting down.
Use for:
- Sun, moon and stars for a space themed cake
- Wafers and butterflies for ice cream
- Hearts and flowers for Valentines.
Chocolate Leaves
Partially melt chocolate over hot water. Remove from heat and continue stirring until completely melted. With a small brush, metal spatula or spoon, carefully coat theunderside of a fresh leaf that does not have fine hairs on it. (Not poisonous leaves like poinsettia, philodendron etc.) Rose or maple leaves or even cabbage will do. Make the chocolate layer about 1/16 inch (.2cm) thick. Be careful not to get chocolate on the front side of the leaf or you won’t be able to remove it easily.
Put the leaf chocolate side up on a waxed paper-lined baking sheet. For a curled effect, cut a paper towel roll in half lengthwise and set leaves inside. Chill about 15 minutes until set. Hold leaf by stem to peel off the chocolate. Store in refrigerator.
Use for:
- Garnishing a torte, chocolate cheese cake or chocolate pie,
Dipping Fruit, Nuts and Candy
Partially melt chocolate over hot water. Remove from heat and continue stirring until completely melted. To keep the chocolate at the right temperature for dipping, set the chocolate over another pan of lukewarm water, about 88°F (30°C) Work quickly making sure the melted chocolate maintains an even warm temperature throughout to assure a rich glossy coating. The type of chocolate used and the correct temperature are the two most important factors for dipping success. Work in a cool place and chill the dipped chocolates quickly.
Dipping Fruits
Wash and dry fruits thoroughly on paper towel. Dip half of the fruit into chocolate. Place on wax paper lined baking sheet. Chill until set. Store in refrigerator.
Dipping Candied Fruit and Nuts
Partially dip holding with fingertips or completely cover with melted chocolate and remove with a fork. Place on waxed paper. Chill. Store in refrigerator.
Dipping Candies
Centres should be at room temperature or chocolate cools down too quickly. Using a fork with long tined, place centres, one at a time in chocolate to cover completely. Lift with fork and remove excess chocolate on side of bowl. Place on waxed paper lined baking sheet, Chill. Store in refrigerator.
Tempering Chocolate
Tempering chocolate is heating and cooling melted chocolate to predetermined temperatures so that the finished chocolate will have a glossy surface and smooth texture when it dries. This is not required when melted chocolate is used as an ingredient in a recipe.
The easiest way to temper chocolate according to Joy of Cooking authors Irma S. Rombauer, Marion Rombauer Becker and Ethan Becker.
Set aside 4 ounces chocolate cut into one-inch chunks. Microwave 1 pound chopped dark chocolate uncovered in a microwave safe plastic bowl on medium for 3 minutes. Stir. For milk and white chocolate use low power. Continue microwaving in increasingly short increments until 2/3 of the chocolate is melted. Stir gently to coax the remaining pieces to melt. Insert thermometer. If the temperature is no higher than 90°F (88°F for milk and white chocolate) the chocolate is in temper and ready to be tested and used. If it is warmer cool it with the reserved chunks until it reaches the specified temperature)
Testing for Temper
Chill a dab of tempered chocolate on a piece of wax paper for 3 minutes. If it is dry to the touch and evenly glossy it is ready to use. To maintain the temper of a bowl of chocolate over an extended period, place it in a water bath up to 2 degrees warmer than the maximum temperatures allowed (90°F for dark, 88°F for milk and white chocolates.)
Source: Baker’s Best Chocolate Cookbook, 1995
The all New All Purpose Joy of Cooking, Irma S. Rombauer, Marion Rombauer Becker and Ethan Becker, 1997.


